
Wedding Flowers

Wedding flowers are wicked expensive. Like stupid expensive. Plus they are basically just dying from before you even start using them. I just can't feed into that kind of nonsense. 

Mark suggested that we went flower free, but I couldn't really get behind that either. So Erin and I set out to make flowers for the wedding! We don't mess around! That being said, the beginning was all messing around. We tried several different things, like making felt flowers, and were kinda hitting the wall. Until Erin made her first paper flower using information she found on the Internet!
paper flowers

I was completely over-the-moon sold. 

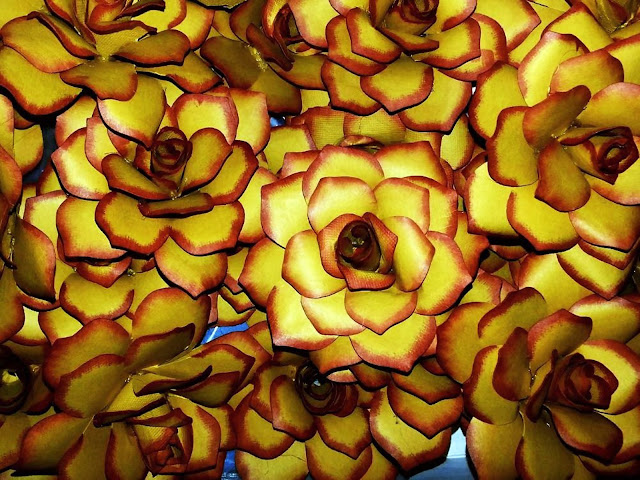
We started making the flowers using Erin's Cricut to cut out all of the paper shapes. She had several die options and the Cricut allowed us to manipulate the shapes to make standard flowers, like roses, and our own creations. 
paper flowers

Cutting out the shapes was only the first step. After we had the shapes, we used Erin's Copic markers to color the edges of the paper to make them look more realistic. Then we used Quilling techniques to curve the paper into petal shapes. Finally, we hot glued it all together. 
paper flowers

After making our first few flowers, we realized we were going to need some help. Luckily, our friends Cort and Liz, were able to pitch in and help us get everything done. 

After spending months making all of the roses we needed (67!), we created easier grey flowers (68 more!) to go with them. These flowers utilized some fake queen anns lace as it's center. 
paper flowers
paper flowers

Finally, we used the Cricut to cut out leaves for the bouquets and attached the bouquet flowers to thick floral wire with hot glue. Erin and Liz arranged them into perfect shapes, before we cut the wire to the correct length and wrapped it all in ribbon. We made 6 bouquets for my bridesmaids and then 1 large bouquet for me. 
paper flower bouquet

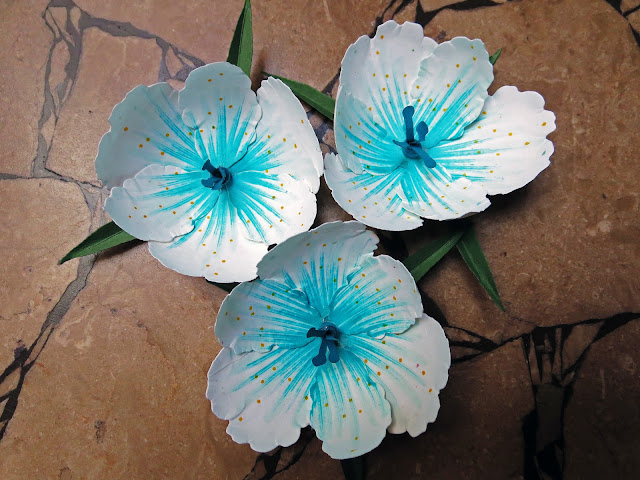
Then we needed to make the boutonnieres and corsages. We used a simple die cut pattern for my Sizzix, added some color (copic and watercolor), and again used some quilling techniques. 
paper flower corsage
paper flower boutonniere

These turned out so much better than any flowers I could have bought. Plus they are now keepsakes for the wonderful people in my wedding party. AND it cost me less than $100 in paper. However, it was hours and hours and hours of work.

Comments

Popular posts from this blog

Wedding Felt Animal Masks

Sarah redesigned the animal masks for me and I could not be more pleased with the results (we are referring to them as the chibi versions)! They are much more appropriately proportioned for smaller faces and printing ease. She even remade all of the patterns for me!  Head over here to see how I made my very first felt animal mask.  This is going to be a long post, as I am going to share all of them here. However, I am not going to go into the details. This is really more of a way for me to show off Sarah's amazing designs and my hard work! Bat:   Bear:   Fox:   Giraffe:   Golden Retriever:   Hippo:   Liger:   Owl:   Panther:   Red Panda:   Sloth:   Snake:   Tiger:   Wolf: If you're interested in buying these masks or the digital templates (with instructions) to create your own, check out my Esty shop: MarstenCo !

New House Colors

Our new home is not open concept. It has many distinct  rooms, which I'm currently loving and enjoying picking out paint colors for. I love a house with character and color, but I don't think it should overwhelm. When deciding my colors,  I chose some basic neutral grays, bieges, whites, and blacks that could be used as connecting colors throughout the house. I also made sure any connecting rooms had colors that complemented each other. Next, I determined a focal design element (painting, furniture, flooring, etc.) that helped defined the room's aesthetic and took into consideration the era the house was built in. Lastly, I used Sherwin Williams  to make personalized color schemes for each room to keep me inspired and focused. Below are the colors I've chosen for each room - don't judge until you see how phenomenally each room turned out (click the links to see)! Living Room : Dining Room : Kitchen: Library: Master Bedroom : Nursery : Guest Room: Upstairs Bathroom:

How to Make Awesome Felt Masks

I forgot to post anything about this. Way back in September, I created some felt masks for Mark and me to wear at the Big Zoo Party. I am very interested in making animal masks for all of the people in our bridal party as well. I think that would make some fun zoo photos. I started by deciding what animal masks I wanted to create and then looked up pictures and masks of said animals. This time I went with Red Fox and Red Panda. The next step was figuring out what supplies I needed. For these masks, I found a very nice mask form and used glue to layer the felt over it. I decided on the design I wanted to reproduce and printed it up to be the size I needed for our masks. Then I cut out the felt to match the shapes I needed. It was pretty simple. I then placed the design on the mask and moved felt pieces around until it looked the way I wanted it to. The hardest part was gluing it all onto the mask without making a huge mess or ruining the felt. I added some finishing touc