
Master Bedroom Remodel

When Mark and I bought our new house, we knew there would be A LOT of remodeling needed to modernize the house and make it more functional for our needs. However, we wanted to make sure we honored the style and design of the house while we did this. My understanding is that the house was built in the 1950s and has had MANY expansions since then (if you could see the ducting in this place!). 

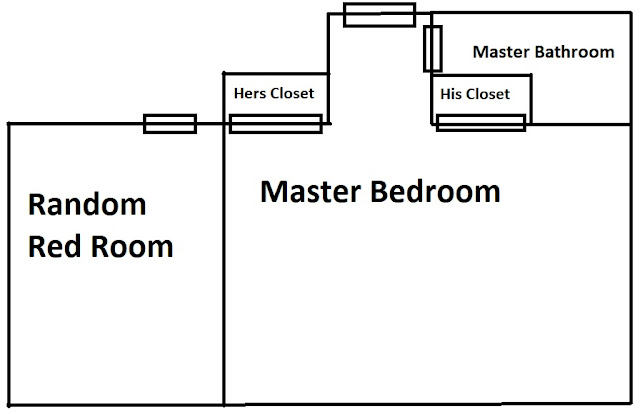
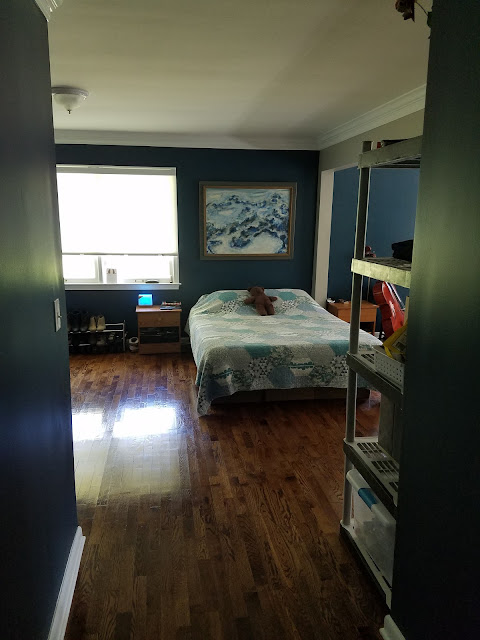
One of my first updates was to expand the Master Bedroom into the small random room next to it. Here's a layout (not to scale) and some pictures to help visualize how it originally looked.

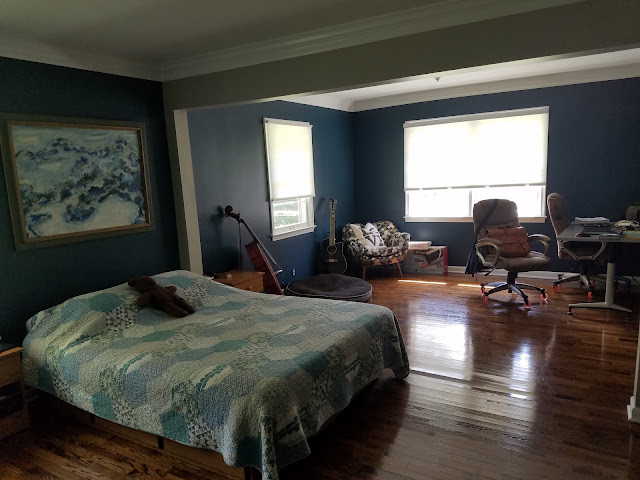
You'll notice we updated the color scheme and refinished the hardwood floors. Here is the updated layout (still not to scale) of the final Master Bedroom (the master bathroom is another project in itself) and some pictures of the updates. 
Master Bedroom Remodel

We still need to buy or build a lot of furniture (to replace some current temporary pieces) needed to finish out the room. Plus, we're considering expanding the Master Bathroom to take up the space of the entrance hallway into the room - but those are future possibilities and concerns!

Comments

Popular posts from this blog

Wedding Felt Animal Masks

Sarah redesigned the animal masks for me and I could not be more pleased with the results (we are referring to them as the chibi versions)! They are much more appropriately proportioned for smaller faces and printing ease. She even remade all of the patterns for me!  Head over here to see how I made my very first felt animal mask.  This is going to be a long post, as I am going to share all of them here. However, I am not going to go into the details. This is really more of a way for me to show off Sarah's amazing designs and my hard work! Bat:   Bear:   Fox:   Giraffe:   Golden Retriever:   Hippo:   Liger:   Owl:   Panther:   Red Panda:   Sloth:   Snake:   Tiger:   Wolf: If you're interested in buying these masks or the digital templates (with instructions) to create your own, check out my Esty shop: MarstenCo !

New House Colors

Our new home is not open concept. It has many distinct  rooms, which I'm currently loving and enjoying picking out paint colors for. I love a house with character and color, but I don't think it should overwhelm. When deciding my colors,  I chose some basic neutral grays, bieges, whites, and blacks that could be used as connecting colors throughout the house. I also made sure any connecting rooms had colors that complemented each other. Next, I determined a focal design element (painting, furniture, flooring, etc.) that helped defined the room's aesthetic and took into consideration the era the house was built in. Lastly, I used Sherwin Williams  to make personalized color schemes for each room to keep me inspired and focused. Below are the colors I've chosen for each room - don't judge until you see how phenomenally each room turned out (click the links to see)! Living Room : Dining Room : Kitchen: Library: Master Bedroom : Nursery : Guest Room: Upstairs Bathroom:

How to Make Awesome Felt Masks

I forgot to post anything about this. Way back in September, I created some felt masks for Mark and me to wear at the Big Zoo Party. I am very interested in making animal masks for all of the people in our bridal party as well. I think that would make some fun zoo photos. I started by deciding what animal masks I wanted to create and then looked up pictures and masks of said animals. This time I went with Red Fox and Red Panda. The next step was figuring out what supplies I needed. For these masks, I found a very nice mask form and used glue to layer the felt over it. I decided on the design I wanted to reproduce and printed it up to be the size I needed for our masks. Then I cut out the felt to match the shapes I needed. It was pretty simple. I then placed the design on the mask and moved felt pieces around until it looked the way I wanted it to. The hardest part was gluing it all onto the mask without making a huge mess or ruining the felt. I added some finishing touc